Visites depuis le 12-10-2016

Retrouvez-moi sur FaceBook

(Cherchez Jean-Louis Coussot)
Pages professionnelles :

Site Web  MODEL CONSULT

Page Facebook MODEL CONSULT


La météo avec WindyTV

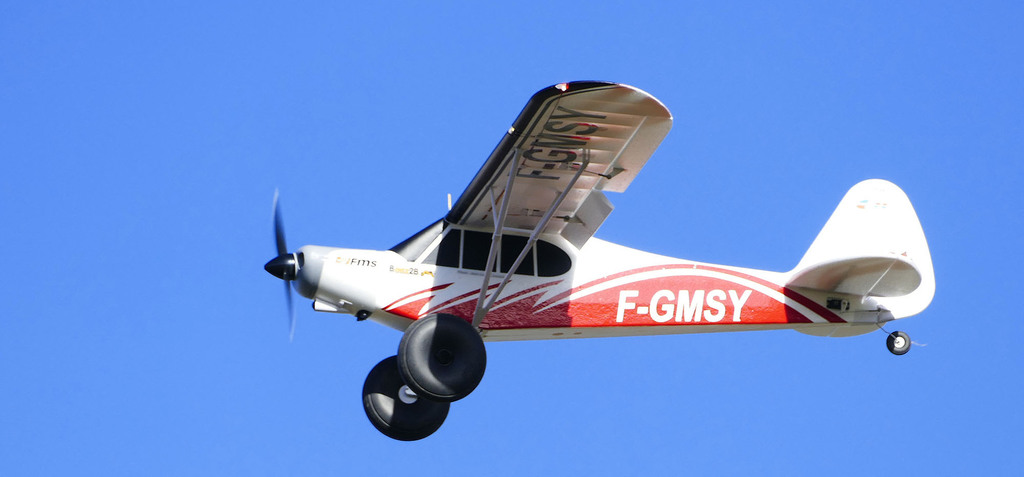
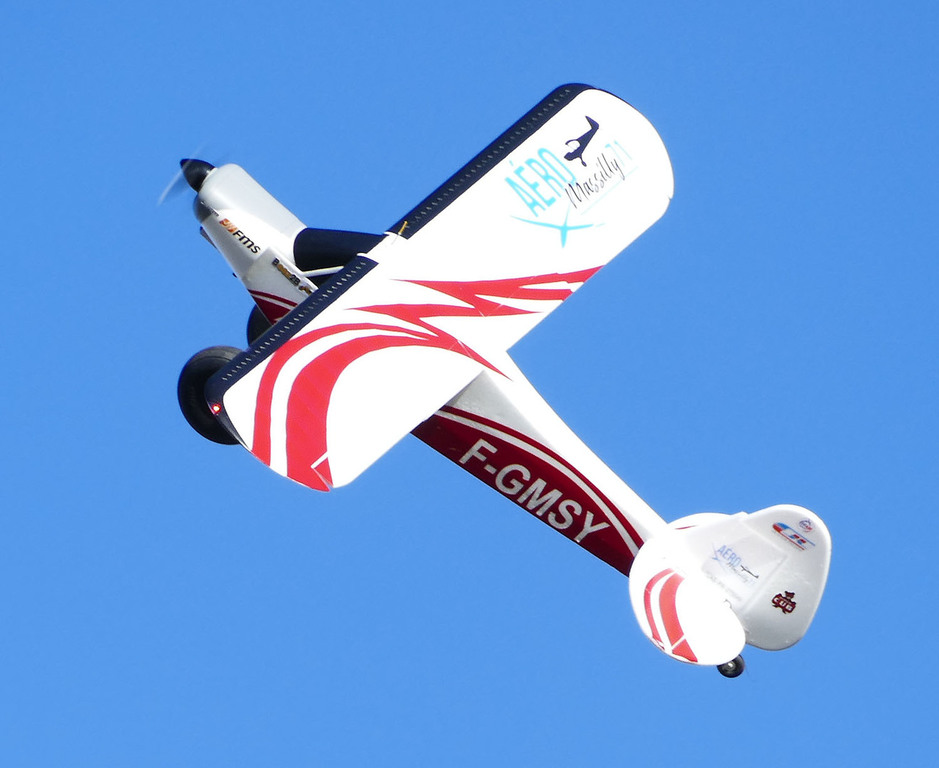
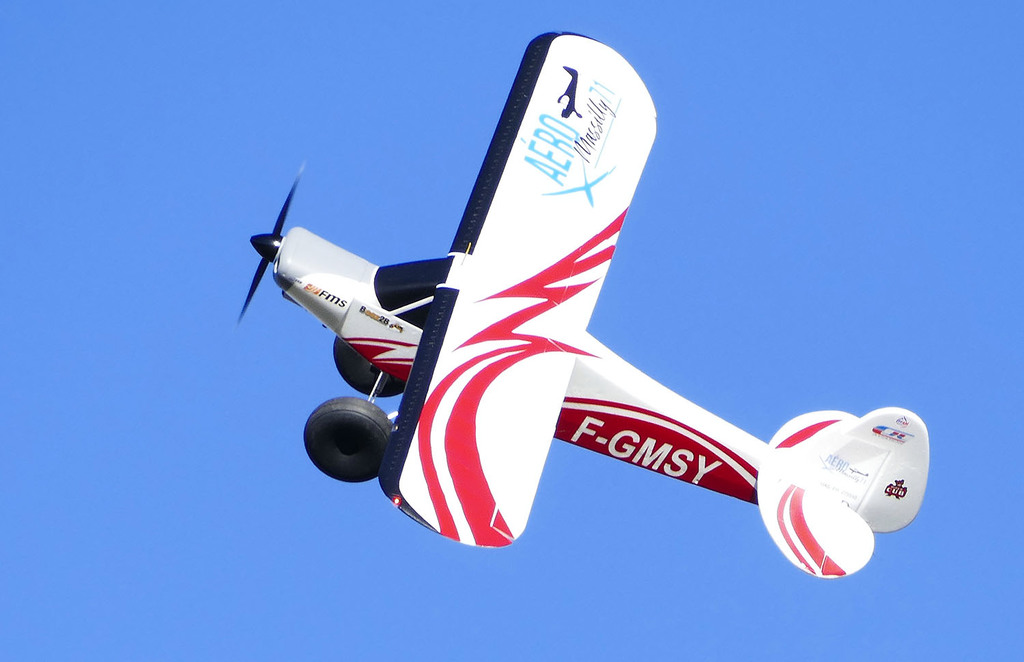
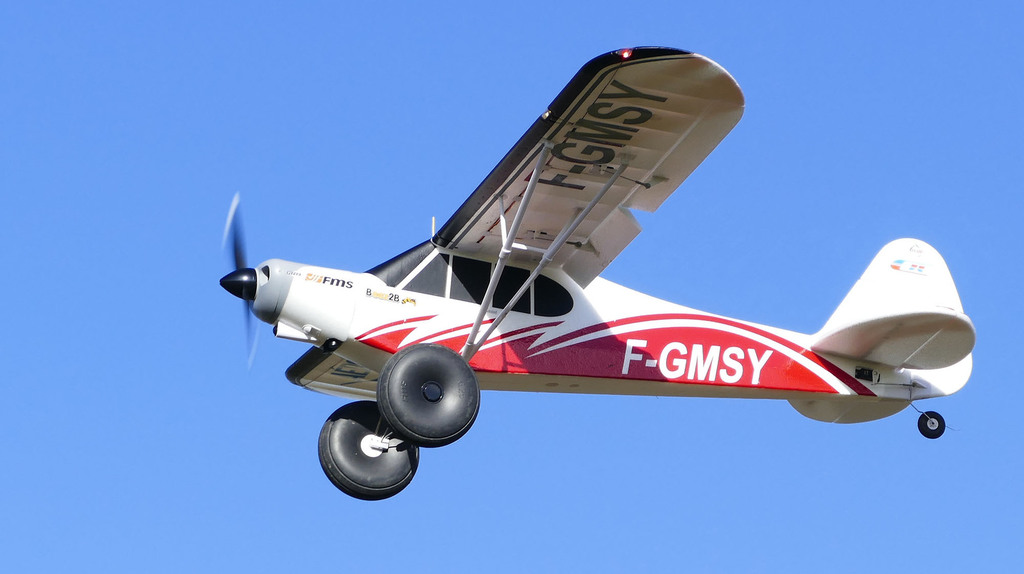
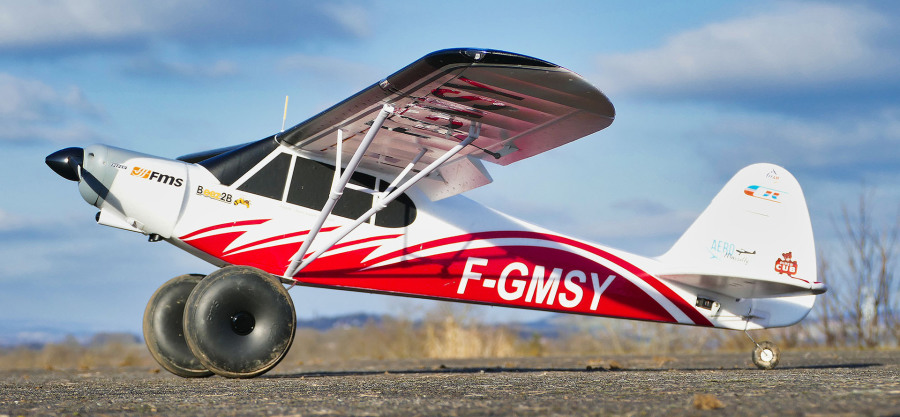
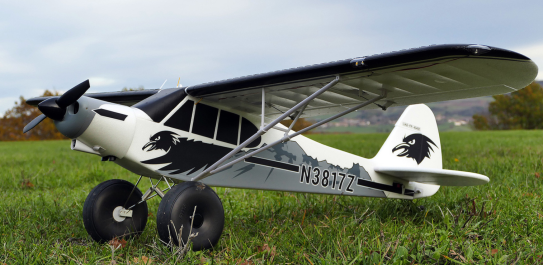
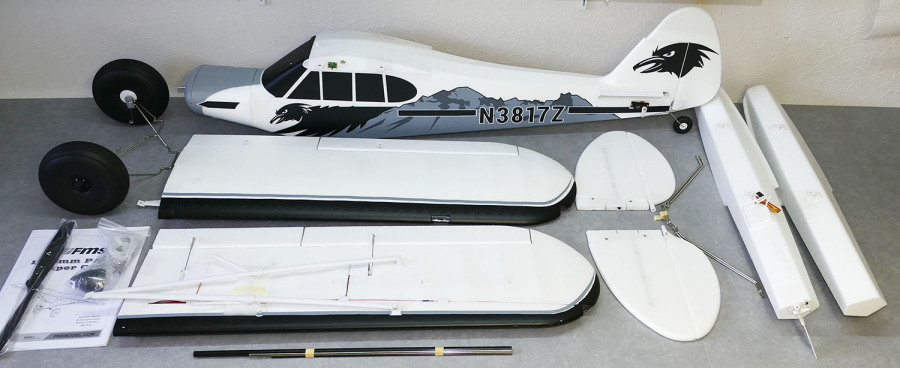
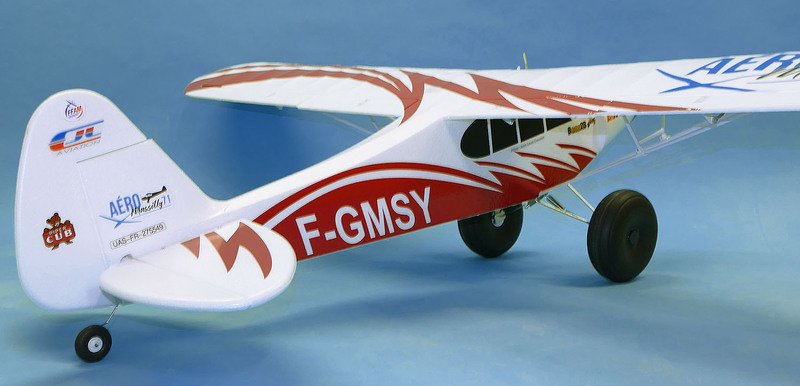
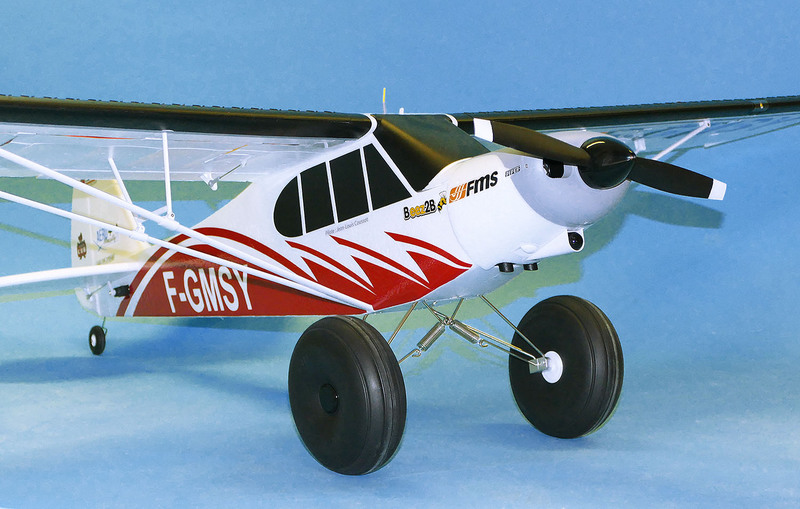
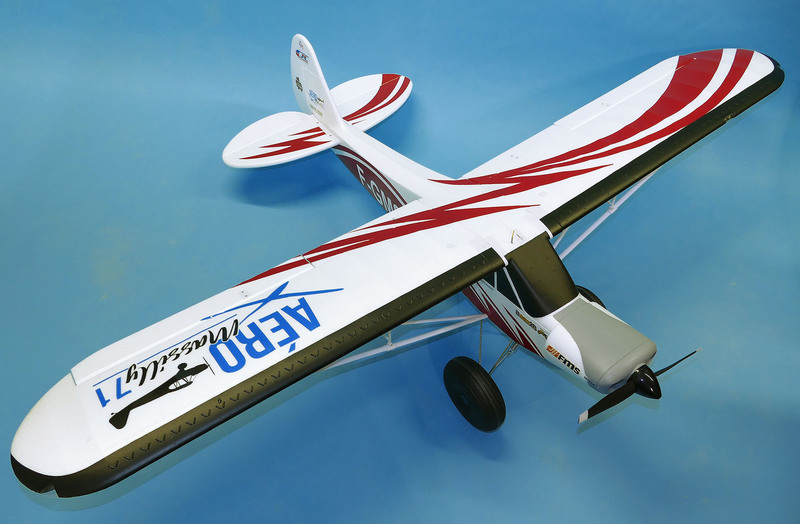
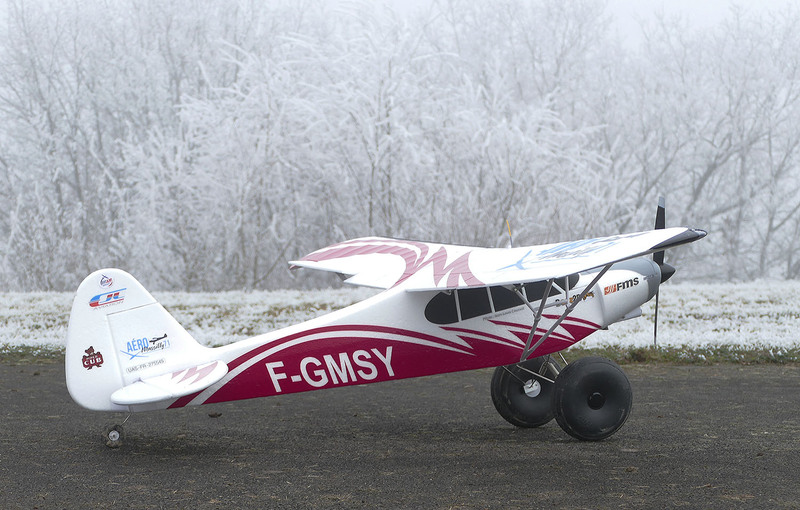
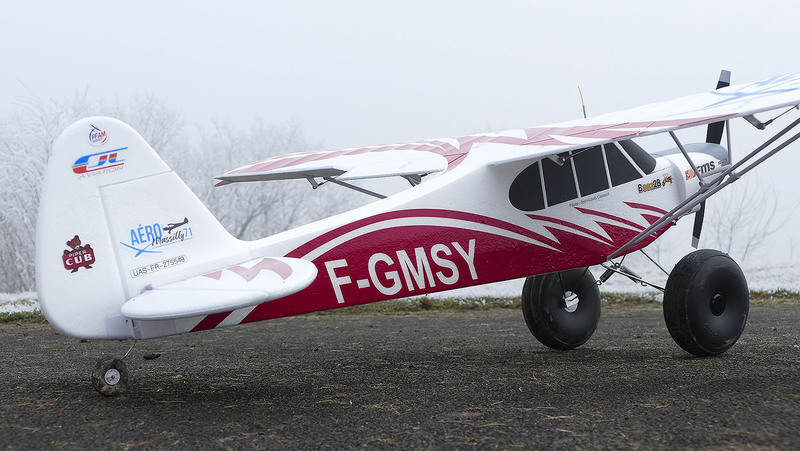
Piper PA-18 FMS - F-GMSY


Fabricant

Distributeur

Réalisation du décor


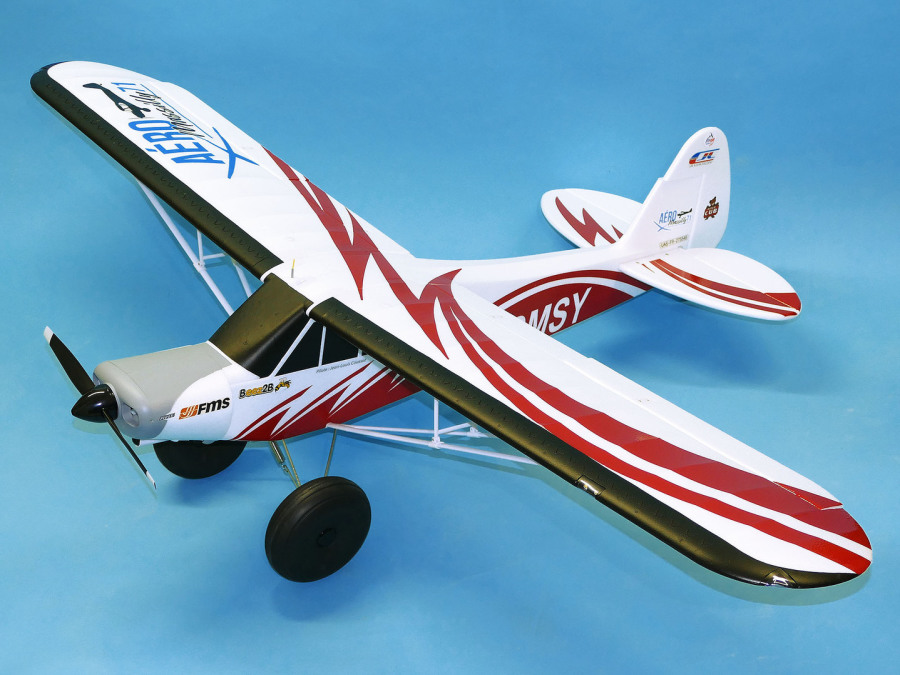
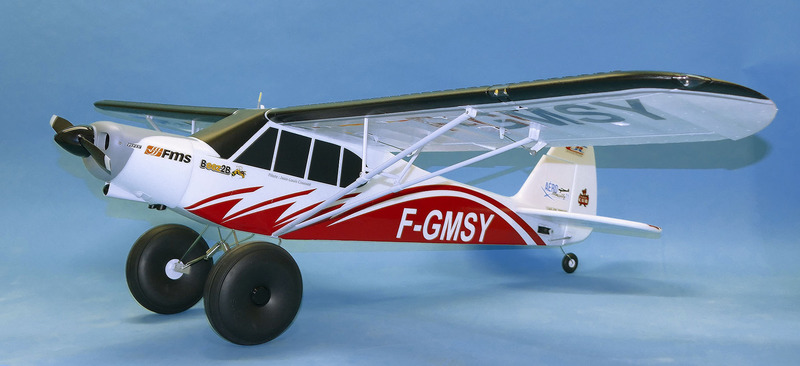
Pour marquer le changement de statut du club d'aéromodélisme de Massilly, qui de section du Foyer Rural de Massilly, devient en 2022 une association indépendante baptisée Aéro Massilly 71, j'ai choisi de monter un nouveau PA-18 FMS et de lui appliquer un décor de circonstance.


To mark the change in status of the Massilly aeromodelling club (France, Burgondy), which from a part of the "Foyer Rural de Massilly", becomes in 2022 an independent association called "Aéro Massilly 71", I have chosen to build a new FMS PA-18 and to apply a dedicated paint scheme.


Texte : Jean-Louis Coussot

Photos : Jean-Louis Coussot


Nombre de visites de cette page / Number of visits of this page

En effet, ce tout petit club, qui compte 18 membres au début de l'année 2022, est particulièrement friand de ce modèle. Pas moins de 11 exemplaires étaient recensés à la fin 2021 ! Et la grande majorité a reçu un décor personnalisé. Il faut dire que j'avais donné le "virus" avec mon OO-BTB qui est depuis passé dans la flotte d'un copain du club (qui se régale à ses commandes), en le faisant essayer à pas mal de monde.


Le 1er janvier 2022 voit donc le lancement officiel d'Aéro Massilly 71, association déclarée en préfecture de Saône et Loire (Mâcon) à la fin 2021. Un logo a été créé par MayLee, graphiste-illustratrice et fille du trésorier du club. Dans ce logo, la silhouette du PA-18 a été insérée, tant l'avion est populaire au sein du club au moment de l'inauguration de son nouveau statut.


J'ai donc voulu monter le douzième PA-18 du club en lui offrant un décor "commémoratif", avec bien sûr le logo bien visible.

Indeed, this quite small club, which had 18 members at the start of 2022, is really fan of this model. No less than 11 copies were listed at the end of 2021! And the  majority have received personalized decor. I can say that I had given the "virus" with my OO-BTB PA-18 (which has since passed into the fleet of a friend of the club, who love flying it), by giving the sticks to many buddies.


January 1, 2022 therefore sees the official launch of Aéro Massilly 71, an association declared in the prefecture of Saône et Loire (Mâcon) at the end of 2021. A logo was created by MayLee, graphic designer-illustrator and daughter of the club's treasurer. In this logo, the silhouette of the PA-18 has been inserted, as the aircraft is popular within the club at the time of the inauguration of its new status.


So I wanted to assemble the club's twelfth PA-18 and to offer it a "commemorative" decoration, with of course the logo clearly visible.


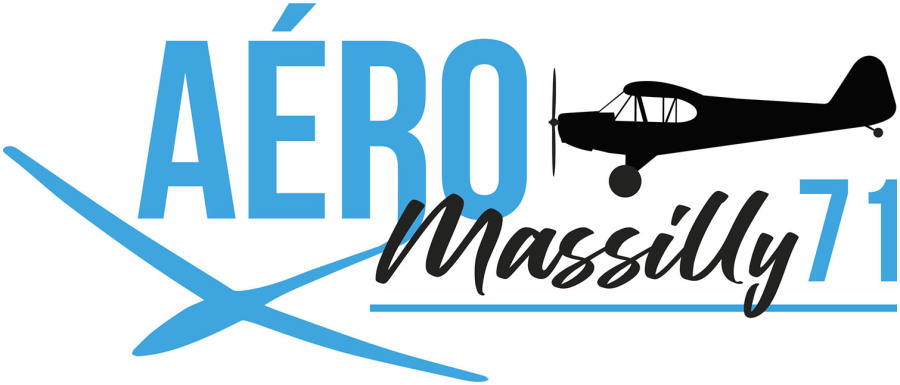
Le logo de l'association "Aéro Massilly 71"                The "Aéro Massilly 71" logo.


Note : Plus d'informations sur le PA-18 1700mm FMS

Le PA-18 du test du kit standard. The stock PA-18 Tested.

L'essai complet du kit du PA-18 1700 mm de FMS est disponible dans la section "Essais". Cliquez ici pour un accès direct.

Le making of d'un autre décor (OO-BTB) sur la même base de PA-18 FMS est également disponible dans la section "Pimp my Plane".

Cliquez ici pour un accès direct.

Note : More infos about the FMS 1700mm PA-18

Le PA-18 avec le décor OO-BTB. The OO-BTB custom paint for the PA-18.

A full review (only in french) of the FMS 1700mm PA-18 is available in the test section (Essais). Click here for a direct access.

The making of of another paint scheme (OO-BTB) for the same PA-18 FMS base is also available in the "Pimp my Plane" section. Click here for direct access.

Rester simple

Pour cet exemplaire, j'ai choisi de faire simple. Contrairement au OO-BTB, je ne vais pas modifier le train principal ni la roulette de queue, pas d'ajouts de haubans, ni d'éclairages supplémentaires. Ce PA-18 sera "léger", maniable, fait pour "jouer" !

J'ai donc commandé un nouveau kit, qui par rapport à celui du OO-BTB possède en standard les flotteurs (ça pourra servir…) et aussi le module de stabilisation Reflex 2. Je connaissais la première version du Reflex qui j'ai dans plusieurs avions FMS, je découvre ici la version 2. A noter que mon premier PA-18 FMS était dépourvu de module de stabilisation, mais que j'avais un récepteur avec gyros intégrés, ce qui revenait au même.

Le kit est arrivé très rapidement et le premier travail a consisté à le débarrasser de son décor d'origine, ce qui est facile puisqu'il s'agit de stickers.

L'ensemble de la cellule a été nettoyé et dégraissé à l'aide de diluant synthétique, afin d'assurer un bon collage du futur décor en vinyle adhésif.


Ci-contre à gauche et ci-dessous, le kit du PA-18 FMS tel qu'il se présente à l'ouverture de la boite.

On the left and behind, the FMS PA-18 kit unboxed.

Keep it simple

For this copy, I chose to keep it simple. Unlike the OO-BTB, I will not modify the main landing gear or the tail wheel, no additions of struts, or additional lighting. This PA-18 will be "light", easy to fly, made just for fun!

So I ordered a new kit, which compared to that of the OO-BTB has as standard the float set (that could be useful…) and also the stabilization module Reflex 2. I knew the first version of the Reflex which I have in several FMS planes, I am discovering version 2 here. Note that my first FMS PA-18 did not have a stabilization module, but that I had a receiver with built-in gyros, which gived the same result.

The kit arrived very quickly and the first job was to get rid of its original decor, which is easy since it is made of stickers.

The entire airframe was cleaned and degreased using synthetic thinner to ensure good bonding of the future adhesive vinyl decoration.

La base du projet de décor

A partir de vues récupérées çà et là entre la notice et internet, les vues de profil, de l'extrados et de l'intrados ont été préparées pour définir le décor. Les éléments "impératifs" ont été mis en place, à savoir le logo du club et des immatriculations.

F-GMSY est une immatriculation fictive, aucun avion inscrit au registre des immatriculations d'avions français ne semble la porter. MSY fait référence à Massilly (MasSillY).

Ensuite, c'est en visionnant de nombreux décors de Piper Cub, Super Cub, et autres Carbon Cub et avions dérivés que j'ai trouvé l'idée générale du décor. Dans un premier temps, je l'ai imaginée en gris, comme les couleurs du décor du kit d'origine.

En plus du décor de base, j'ai ajouté le logo "Piper Cub" avec son ourson, tellement emblématique de ces avions, ainsi que le logo FMS et celui de Beez2B qui est le distributeur implanté en Belgique et qui fourni les magasins de France, du Benelux et de quelques autres pays en produits FMS (entre autres). Un logo JLC-Aviation était bien sûr à prévoir...


Paint scheme project basis

From views taken from the manual and from internet, the profile views, the upper surface and the lower surface were prepared to define the decor. The "mandatory" elements have been installed, namely the club's logo and registrations numbers.

F-GMSY is a fictitious registration, no aircraft registered in the French aircraft  register seems to use it. MSY refers to Massilly (MasSillY).

Then, it was by viewing many pictures of Piper Cub, Super Cub, and other Carbon Cubs and derivative planes that I found the general idea of the decor. First, I imagined it in gray, like the decor colors of the original FMS kit.

In addition to the basic decor, I added the "Piper Cub" logo with its teddy bear, so emblematic of these planes, as well as the FMS logo and that of Beez2B which is the distributor located in Belgium and which supplies stores in France, Benelux and some other countries with FMS products (among others). A JLC-Aviation logo was of course to be expected ...

Choix final : plus de couleur !

En en discutant avec Didier Cervera, alias "CD Design" qui allait s'occuper de la découpe des stickers en vinyle, il a été trouvé que ce gris était trop austère et que l'avion méritait d'être plus "flashy". Le décor gris est devenu rouge et c'est sur ce projet que je me suis décidé.

Final choice : more color!

While discussing it with Didier Cervera, alias "CD Design" who was going to cut of the vinyl stickers, it was found that this gray was too austere and that the plane deserved to be more "flashy". The gray decor has turned red and it is on this project that I decided.

Réalisation du set de décor

Il restait à tracer l'ensemble des éléments à faire fabriquer en vinyle adhésif ou en stickers imprimés à l'échelle exacte de l'avion. J'utilise Adobe Illustrator pour cette étape. C'est une planche près de 2 mètres de long et 60 cm de haut qui a été préparée. Elle comprend la totalité des éléments à l'exception des logos JLC-Aviation puisque j'ai des planches de stickers en stock.

Ensuite, le fichier a été confié à CD Design, spécialiste de la découpe d'adhésifs pour les aéromodélistes installé à Replonges, dans l'Ain, et très proche de chez moi. (Notez qu'il peut expédier des sets de décor partout en France, en Europe et même dans le monde entier !)

Note : si vous ne disposez pas d'un logiciel permettant de préparer les fichiers, CD Design peut réaliser ce travail avant la découpe. De même, si vous souhaitez un décor personnalisé et que vous n'avez pas d'idée, CD Design peut concevoir un décor totalement original.

CD Design produit aussi des kits d'avions et de planeurs découpés laser.

Son site internet : http://www.cddesign01.com


Making of the decor set

It remained to draw all the parts to be made in adhesive vinyl or stickers printed at the exact scale of the aircraft. I am using Adobe Illustrator for this step. It is a sheet almost 2 meters long and 60 cm high that has been prepared. It includes all the elements except the JLC-Aviation logos since I have stickers in stock.

Then, the file was entrusted to CD Design, specialist in the cutting of adhesives for model aircraft builders installed in Replonges, in the Ain department, and very close to my home. (Note that he can ship decor sets anywhere in France, Europe and even worldwide!)


Note: if you do not have the software to prepare the files, CD Design can do this job before cutting. Likewise, if you want a personalized decor and you have no idea, CD Design can design a totally original decor.

CD Design also produces laser cut airplane and glider kits.

His website: http://www.cddesign01.com


--------------


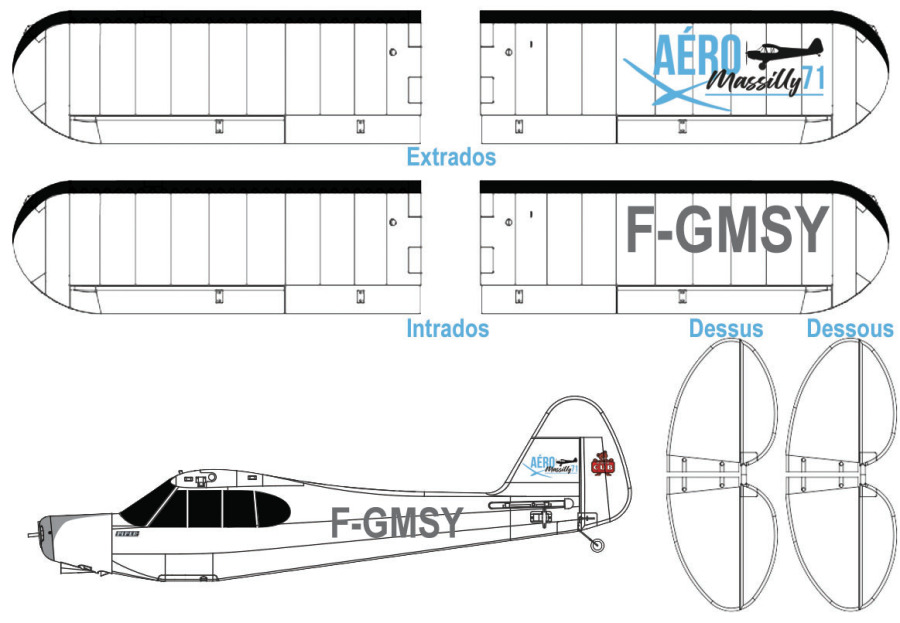
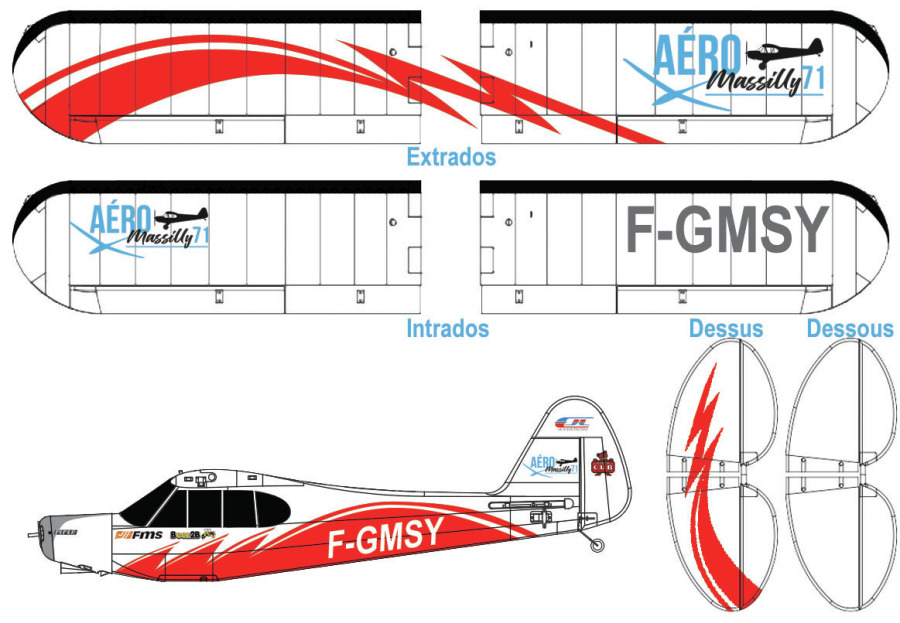
La planche de décor a échelle 1:1 réalisée sous Illustrator.                         The 1:1th scale sheet designed under Adobe Illustrator.


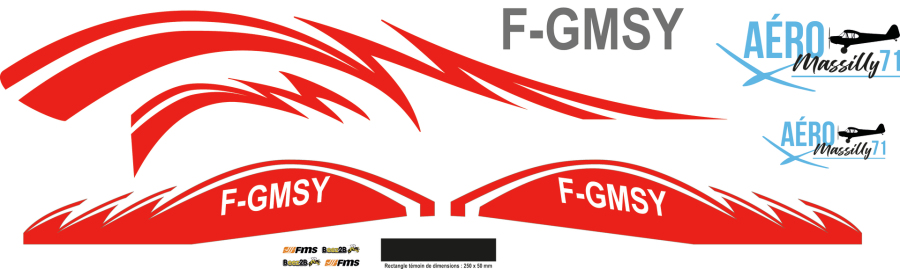
Et voilà le set de décor réalisé par CD Design.                                                  And this the decor set made by CD Design.


CD Design m'a trouvé un rouge métallisé, dans un vinyle ultra-fin, léger et surtout avec un pouvoir adhésif très puissant, parfaitement adapté à la pose sur la mousse EPO. Les logos du club et l'immatriculation gris de l'intrados sont dans un vinyle plus standard. Il ne reste plus qu'à tout poser…


CD Design found a metallic red, in an ultra-thin vinyl, light and with a very powerful adhesive power, perfectly suited to installation on EPO foam. The club logos and the gray lower surface registration are in a more standard vinyl. All that remains is to place all these stickers on the airframe ...


Gros plan sur les logos imprimés.                                                         Close-up on printed logos.


Résultat final

Une fois les décors posés, il ne restait plus qu'à réaliser l'assemblage final du PA-18, qui est monté tel que prévu dans le kit. En quelques minutes, il était prêt !

Ci-dessous, vous avez d'autres photos "studio" du résultat obtenu.


Final result

Once the adhesive decor were in place, all that remained was to carry out the final assembly of the PA-18, which was assembled "stock", as planned in the manual. In a few minutes it was ready for the maiden flight!

Below, you have other "studio" photos of the result.


Un mot sur le module "REFLEX 2"

Le module de stabilisation "Reflex 2" de FMS est désormais monté d'origine sur les kits de PA-18.

Ce module se connecte entre le récepteur et les servos d'ailerons, de profondeur et de direction et il tient également compte de la voie des gaz.

Commandé par une voie auxiliaire que l'on affecte à un inter à 3 positions, il offre trois modes de fonctionnement :

  • Inter en position centrale, il est tout simplement désactivé. Vous pilotez normalement votre modèle, sans assistance.
  • Inter d'un côté : les gyros et accéléromètres assurent une stabilisation sur 3 axes afin de vous aider à contrer les effets du vent, des turbulences. Le vol est plus stable, plus tendu, comme si vous aviez un modèle plus grand, avec plus d'inertie. Mais vous n'êtes en rien limité dans vos évolutions. Les actions sont totalement transparentes pour le pilote qui ne trouve que du confort !
  • Inter de l'autre côté, c'est un mode pour débutants : d'une part, il limite les possibilités d'incliner latéralement l'avion à environ 30 degrés, et il limite de même la possibilité de cabrer ou de piquer. Vous pouvez tenir le manche en butée, il ne dépassera pas les limites fixées par la programmation du module. De plus, si vous relâchez les manches, il remet automatiquement et très rapidement l'avion en vol à plat. Moteur réduit, l'avion prend une assiette de plané saine, tandis que plein gaz, il va monter en douceur. A mi-gaz, l'avion tient le palier et on peut tourner juste aux ailerons en oubliant de soutenir à la profondeur.


La version 2 du module Reflex a comme particularité d'être reprogrammable. Attention : vous ne pouvez pas accéder aux paramètres de la programmation pour régler les gains ou des mixages… Vous pouvez uniquement lui injecter les paramètres d'un autre modèle FMS, grâce à un logiciel que vous téléchargez sur le site FMS, et au cordon USB qui est fourni à brancher entre le PC et le module. Ainsi, si vous avez un avion FMS non équipé Reflex, vous pouvez transférer le Reflex 2 et l'adapter à ce modèle.


Sur le PA-18, l'installation d'origine du Reflex 2 est sur la platine support d'accu et j'ai trouvé qu'il était gênant pour une bonne mise en place de la batterie. Je l'ai décollé et repositionné plus en arrière, en conservant scrupuleusement son orientation d'origine. Ainsi, ma batterie se loge bien à plat et je peux aussi utiliser des packs de plus forte capacité que ce qui est proposé.


About the "REFLEX 2" module

FMS's "Reflex 2" stabilization module is now fitted as standard on the PA-18 kits.

This module connects between the receiver and the aileron, elevator and rudder servos and it also takes care of the throttle setting.

Controlled by an auxiliary channel which is assigned to a 3-position switch, it offers three operating modes:

  • Switch in center position, it is just deactivated. You fly your model normally, unassisted.
  • Switch on one side: the gyros and accelerometers provide stabilization on 3 axes to help you counter the effects of wind and turbulence. The flight is more stable, more "on a rail", as if you had a larger model, with more inertia. But you are in no way limited in your evolutions. The actions are fully transparent for the pilot who finds nothing but comfort!
  • Switch on the other side, it is a mode for beginners: first, it limits the possibilities of tilting the plane sideways to about 30 degrees, and it also limits the possibility of nose-up or nose-down. You can hold the stick as far as it will go, it will not exceed the limits set by the module programming. In addition, if you center the sticks, it will automatically and very quickly put the plane back into level attitude. With the motor at idle, the airplane assumes a healthy glide attitude, while at full throttle it will climb smoothly. At half throttle, the airplane holds altitude and we can just turn using ailerons, forgetting to add some up elevator.


Version 2 of the Reflex module has the particularity of being reprogrammable. Warning: you cannot access the programming parameters to adjust the gains or the mixes ... You can only insert the parameters of another FMS model into it, using software that you download from the FMS website, and the USB cable which is supplied to be connected between the PC and the module. So, if you have an FMS aircraft not equipped with Reflex, you can transfer the Reflex 2 and adapt it to this model.


On the PA-18, the original installation of the Reflex 2 is on the battery support plate and I found it inconvenient for the correct installation of the battery. I took it off and repositioned it further back, scrupulously keeping its original orientation. Thus, my battery sits flat and I can also use packs with a higher capacity than what is suggested.


Réglages

Mon premier PA-18 FMS n'ayant pas de module Reflex, j'avais recâblé les servos des ailes afin d'utiliser une voie par servo, ce qui me permettait de régler le différentiel des ailerons.

Cette fois, avec un module Reflex ne permettant pas de gérer séparément les deux ailerons, j'ai conservé le montage d'origine et donc, je n'ai qu'une voie pour les deux ailerons.

Sans différentiel, le PA-18 est parfaitement pilotable, je le sais pour avoir réalisé les premiers vols de plusieurs des PA-18 FMS dans mon club. Toutefois, je trouve l'agrément un peu inférieur, avec un lacet inverse très présent.

Sur le PA-18 F-GMSY, j'ai donc déposé les servos d'ailerons, ce qui est facile grâce aux boîtiers installés qui peuvent être ouverts. Ceci permet de décaler le neutre du palonnier du servo d'un cran vers l'avant. J'aurais bien décalé de deux crans, mais la commande aurait été alors trop courte. Une fois le servo remonté, il reste à ajuster la longueur de la commande. On obtient ainsi un peu de différentiel, qui réduit un peu le lacet inverse. Les deux photos montrent l'opération.

Settings

My first FMS PA-18 did not have a Reflex module, I had rewired the wing servos to use one channel per aileron servo, which allowed to adjust the aileron differential.

This time, with the Reflex module not allowing separate management of the two ailerons, I kept the original assembly and therefore, I only have one channel for the two ailerons.

Without differential, the PA-18 is perfectly flyable, I know it from having carried out the maiden flights of several of the PA-18 FMS in my club. However, I find it less comfortable, with a reverse yaw quite present.

So, on the PA-18 F-GMSY, I extracted the aileron servos, which is easy thanks to the installed cases that can be opened. This allows to shift one notch the neutral of the servo arm. I would have moved two notches, but the linkage would then be too short. Once the servo is re-installed, it remains to adjust the length of the  linkage. This gives a little aileron differential, which reduces the reverse yaw a little. The two photos show the operation.


J'ai aussi décalé les boules des chapes des guignols de profondeur et de direction afin d'obtenir de gros débattements quand j'aurais envie de remuer le Piper… Mais je prévois un inter de doubles débattements afin de pouvoir voler cool et pour pouvoir le prêter aux amis peu habitués à des machines très remuantes.

En relisant l'essai de mon premier PA-18, je vois que je volais avec un centrage très reculé, à 90 mm du bord d'attaque. Les premiers vols de celui-ci ont été faits sans contrôler le centrage, puisque les plus de 10 PA-18 de mon club volent sans rien modifier et avec toutes tailles de packs d'accus de 2500 à 5000 mAh !

Après coup, j'ai tout de même mesuré le centrage de ces premiers vols et surprise, il était à 75 mm du B.A. !

J'ai ensuite reculé le pack pour voler centré au moins à 80 mm. Mais sans la roulette de queue maquette du OO-BTB, atteindre les 90 mm ne peut se faire sans l'ester l'arrière... Ce dont je vais me dispenser, l'avion vole bien ainsi.

Un réglage de plus...

Avec de nombreux PA-18 testés et deux ans à pratiquer ces avions, j'ai dû constater que les remises de gaz lors d'un touch and go effectuées plein volets créaient un très fort couple cabreur, qui se contre bien, mais demande une réaction rapide. Plusieurs copains se sont "fait avoir" et ont décroché sur ce type de manœuvre. L'effet se sent moins avec le premier cran de volets, mais il est tout de même présent. Volets au premier ou au second cran, on n'a aucun souci jusqu’à plus de mi-gaz, la compensation volets > profondeur fait bien son travail. C'est plein gaz que le couple cabreur est sensible.

Sur le F-GMSY, j'ai donc voulu supprimer cet effet indésirable et j'ai ajouté un mixage "Gaz > Profondeur". Ce mixage est obtenu avec une "courbe", car il ne doit commencer à agir que quand les gaz sont à environ 60/65 %, pas avant. Donc, à partir de 65 % de gaz, le mixage ajoute un peu de profondeur à piquer, avec un taux qui dépend de la position des volets : Rien volets rentrés, léger volets au premier cran et plus accentué au second cran.

Et ça marche très bien ! La remise de gaz plein volets permet de repartir à plat, sans que l'avion se cabre. C'est du confort et de la sécurité en plus. Les valeurs sont dans le tableau.

I also shifted the balls of the elevator and rudder horns in order to obtain large deflections when I wanted to move hard the Piper… But I plan a dual rate switch to be able to fly cool and to give the sticks to friends unaccustomed to very maneuverable aircrafts.

By reading the test of my first PA-18, I see that I was flying with a quite rear center of gravity setting : 90 mm from the leading edge. The first flights of this one were made without checking the C.G., since the more than 10 PA-18s of my club are flying without modifying anything and with all sizes of battery packs, from 2500 to 5000 mAh!

Afterwards, I still measured the C.G. of my maiden flight with F-GMSY and surprise... it was balanced at 75 mm from the leading edge!

I then moved the pack back to fly centered at least at 80mm. But without the scale tail wheel added on the OO-BTB, reaching 90 mm cannot be done without adding weight at the rear... I will do without, the plane flies well as well.

One more mix...

With so many FMS PA-18s tested and two years flying these planes, I noticed that go-arounds after a touch and go, keeping full flaps, created a very strong nose-up pitch effect, which counteracts well, but requires a quick reaction. Several friends have been tricked and have stalled on this type of maneuver. The effect is less felt with flpas in take-off notch, but it is still present. Flaps at take-off or landing notch, there is no problem up to more than half throttle, the flaps> elevator mix does its job well. The nose-up pitching is sensitive at full throttle.

On the F-GMSY, I therefore wanted to remove this undesirable effect and I added a "Throttle > Elevator" mix. This mix is obtained using a "curve", because it should only start to act when the throttle reach around 60/65%, not before. So, from 65% throttle, the mix adds a bit of nose-down elevator, with a rate which depends on the position of the flaps: Nothing flaps retracted, slight with flaps on the take-off notch and more accentuated on the landing notch.

And this works very well ! The full flap go-around with full throttle keep now a level flight, without the aircraft pitching up. It is more comfort and more safety. The settings ​​are in the table below.

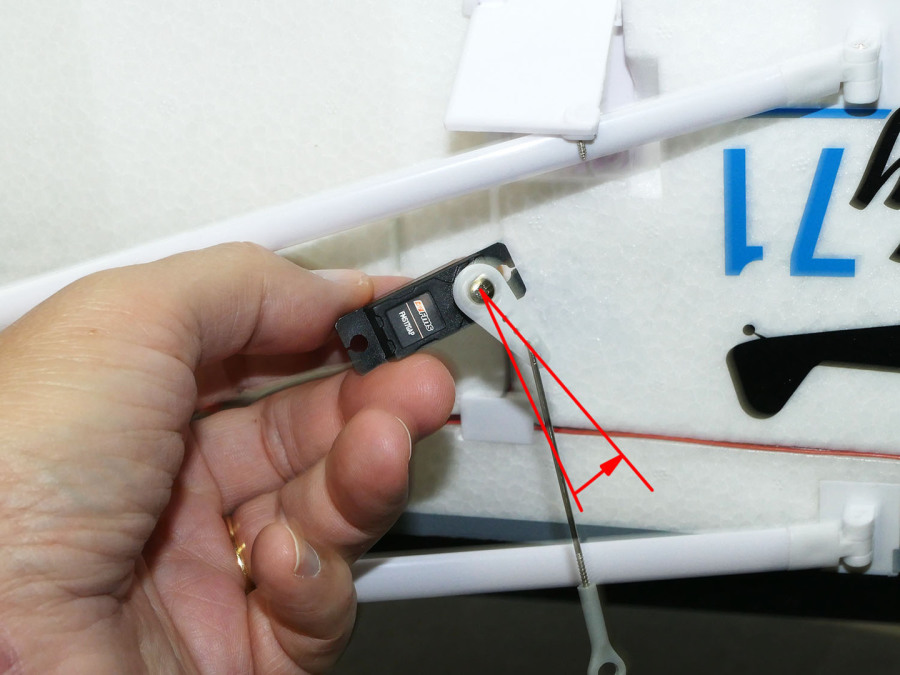
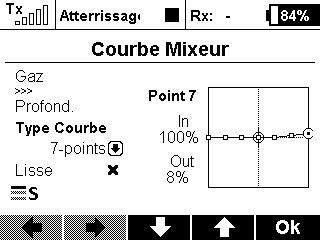
Voici le mixage Gaz > Profondeur sur un émetteur JETI DC-16. / Here is the Throttle > Elevator Mix seen on a Jeti DC16 transmitter.


Réglages du PA-18 F-GMSY / PA-18 F-GMSY settings


Centrage / C.G. 80 mm du bord d'attaque / 80 mm behind the leading edge.


Gouverne

Control surface

Petits débattements

Low Rates

Grands débattements

High Rates

Ailerons

Ailerons

Vers le haut : 18 mm (Up)

Vers le bas : 15 mm (Down)

Expo : 20 %

Vers le haut : 24 mm (Up)

Vers le bas : 17 mm (Down)

Expo : 35 %

Profondeur

Elevator

Vers le haut : 20 mm (Up)

Vers le bas : 20 mm (Down)

Expo : 20 %

Vers le haut : 30 mm (Up)

Vers le bas : 30 mm (Down)

Expo : 35 %

Direction

Rudder

Vers la droite : 30 mm (Right)

Vers la gauche : 30 mm (Left)

Expo : 0 %

Vers la droite : 40 mm (Right)

Vers la gauche : 40 mm (Left)

Expo : 30 %

Volets

Flaps

Décollage / Take-off : 20 mm Atterrissage / Landing : 40 mm
Mixages / Mixes

Mixage Volets > Profondeur

Flaps > Elevator mix

Volets décollage/Take-off flaps :

5 mm de profondeur à piquer / 5 mm elevator down

Volets atterissage/Landing flaps :

10 mm de profondeur à piquer / 10 mm elevator down

Mixage Ailerons > Direction

Aileron > Rudder mix

Volets 0 : Ailerons max > 8 mm de direction (même sens)

Flaps 0 : Max aileron > Rudder 8 mm (same direction)

Volets 1 : Ailerons max > 10 mm de direction (même sens)

Flaps 1 : Max aileron > Rudder 10 mm (same direction)

Volets 2 : Ailerons max > 13 mm de direction (même sens)

Flaps 2 : Max aileron > Rudder 13 mm (same direction)

Volets 0 : Ailerons max > 10 mm de direction (même sens)

Flaps 0 : Max aileron > Rudder 10 mm (same direction)

Volets 1 : Ailerons max > 15 mm de direction (même sens)

Flaps 1 : Max aileron > Rudder 15 mm (same direction)

Volets 2 : Ailerons max > 18 mm de direction (même sens)

Flaps 2 : Max aileron > Rudder 18 mm (same direction)

Mixage Gaz > Profondeur

Throttle > Elevator mix

Volets 0 / Flaps 0 : Rien / None

Volets décollage / Take-off flaps : 0 > 65% de gaz (Throttle) : Aucun effet / no effect. De 65% à 100% de gaz (From 65 to 100% throttle) : Profondeur progressivement à piquer de 1,5 mm / Gradually elevator down 1.5mm.

Volets atterrissage / Take-off flaps : 0 > 65% de gaz (Throttle) : Aucun effet / no effect. De 65% à 100% de gaz (From 65 to 100% throttle) : Profondeur progressivement à piquer de 3 mm / Gradually elevator down 3mm.

Caractéristiques / Technical datas

Nom / Name : 1700mm PA-18 Super Cub

Fabricant / Manufacturer : FMS

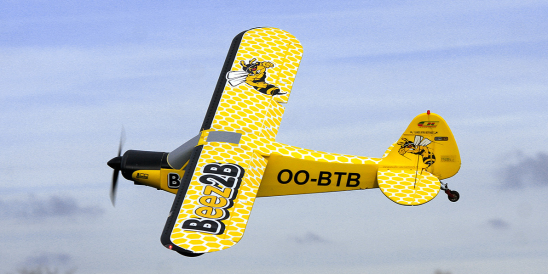
Distributeur / France, Benelux distributor : Beez2B

Envergure / Wingspan : 1 700 mm

Longueur / Lenght : 1 190 mm

Corde d'aile / Wing width : 260 mm

Surface alaire / Wing Area : 42 dm2

Profil d'aile / Airfoil  : Plan convexe / Flat lower surface

Masse annoncée / Manual weight : 2 100 g

Masse obtenue avec LiPo 4S 2 700 mAh / Effective weight with 4S 2 700 mAh Lipo  : 2 275 g

Charge alaire avec LiPo 4S 2 700 mAh / Wing loading with 4S 2 700 mAh Lipo : 54 g/dm2

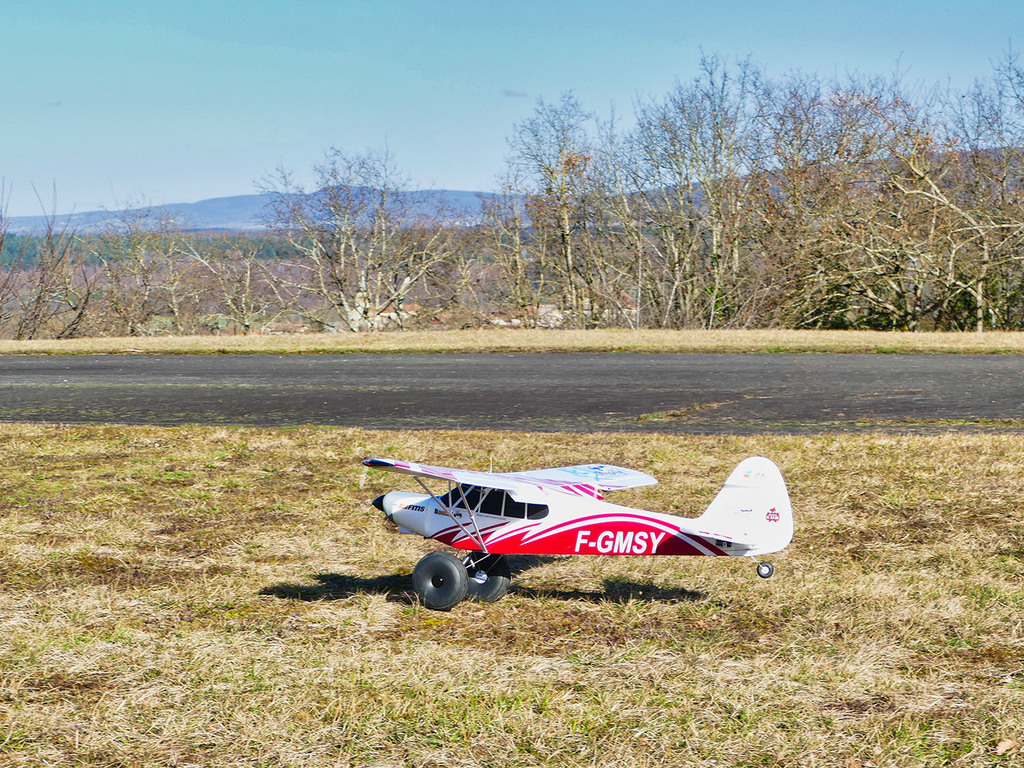
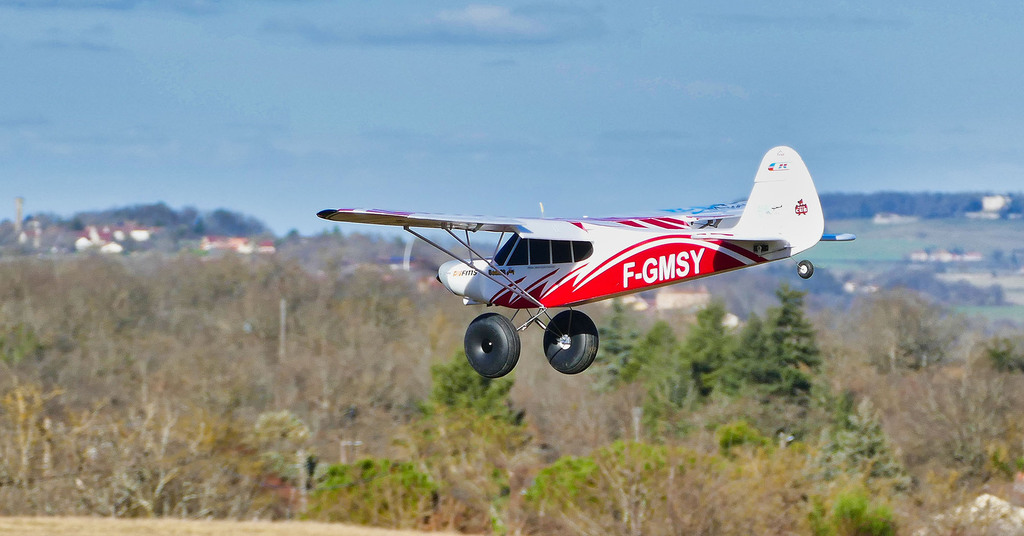
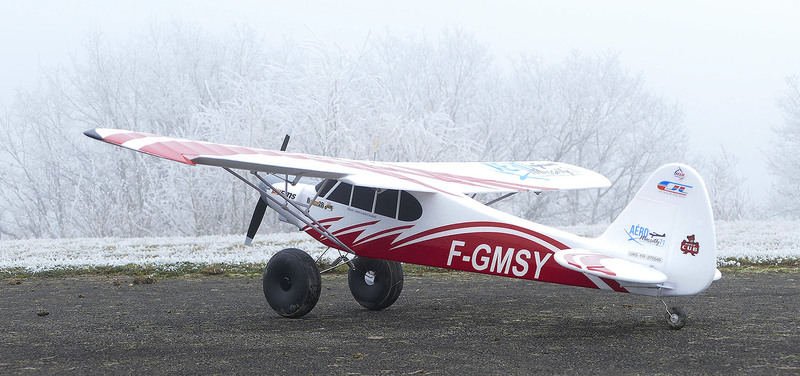
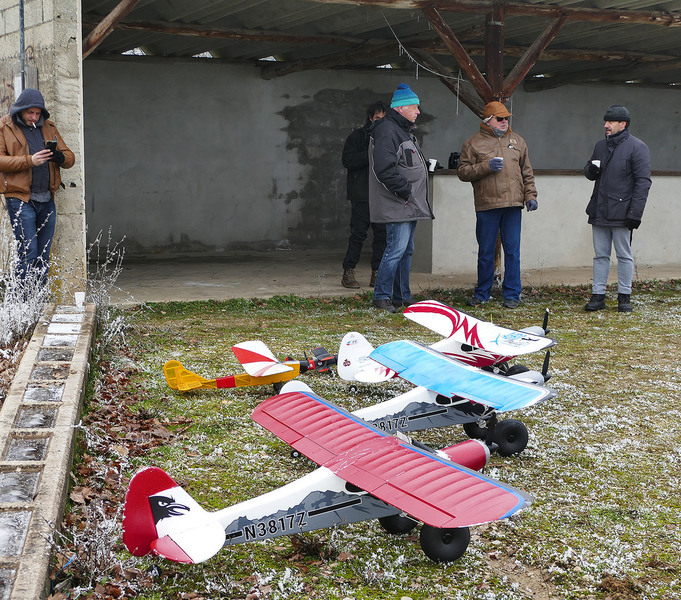
Présentation officielle du F-GMSY à Massilly le 15 janvier 2022

Official Roll-Out of F-GMSY in Massilly on 15 January 2022


Malgré le brouillard givrant, une température de -4°C, une visibilité de 100 mètres et un plafond de 15 mètres, le PA-18 F-GMSY a pu être présenté sur le terrain d'Aéro Massilly 71 et a réalisés 4 vols dans un volume restreint, à très basse vitesse. Le début d'une belle carrière !


Despite the freezing fog, a temperature of -4°C, a visibility of 100 meters and a ceiling of 15 meters, the PA-18 F-GMSY made his roll-out on the Aéro Massilly 71 flying field and made 4 flights in a limited volume, at very low speed. The start of a great career!

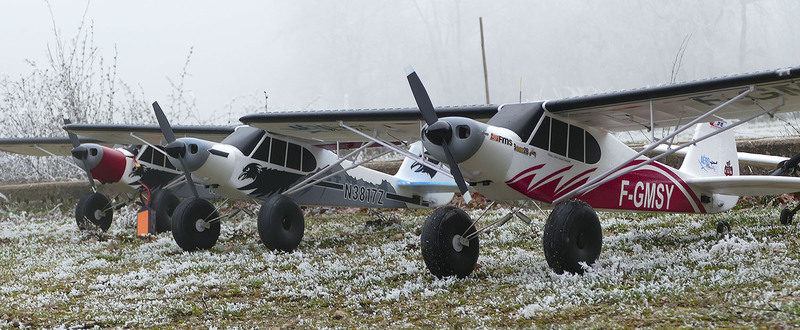
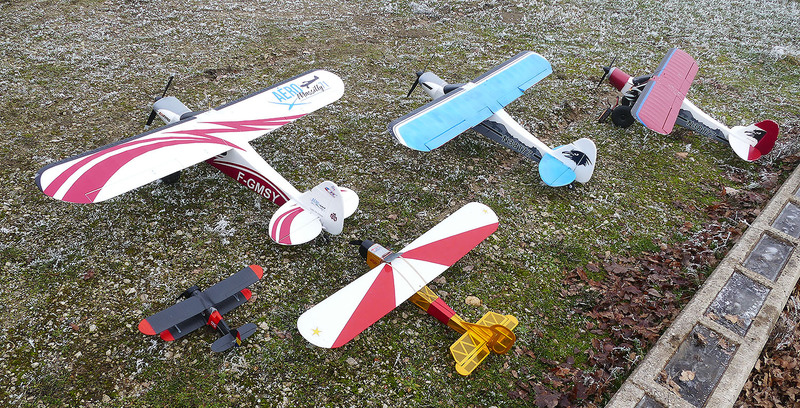
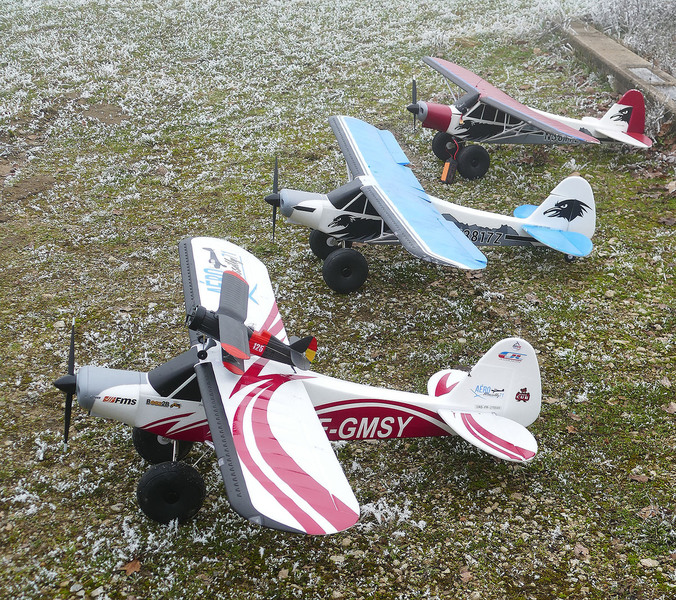
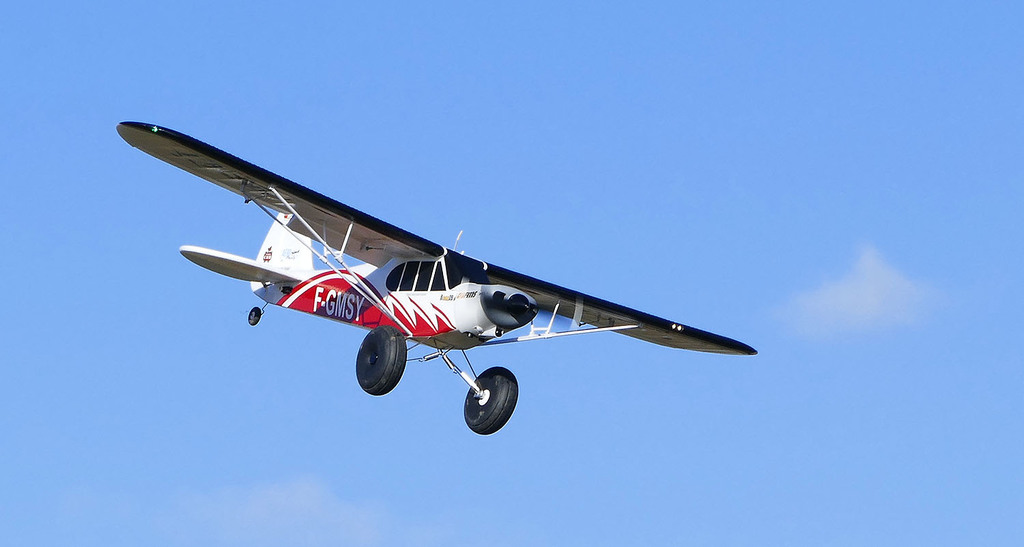
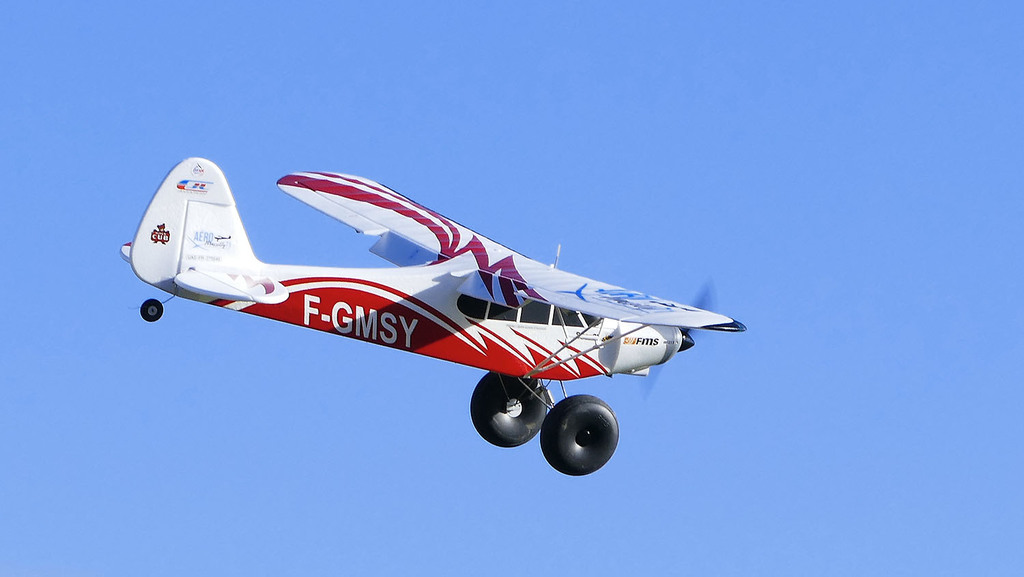
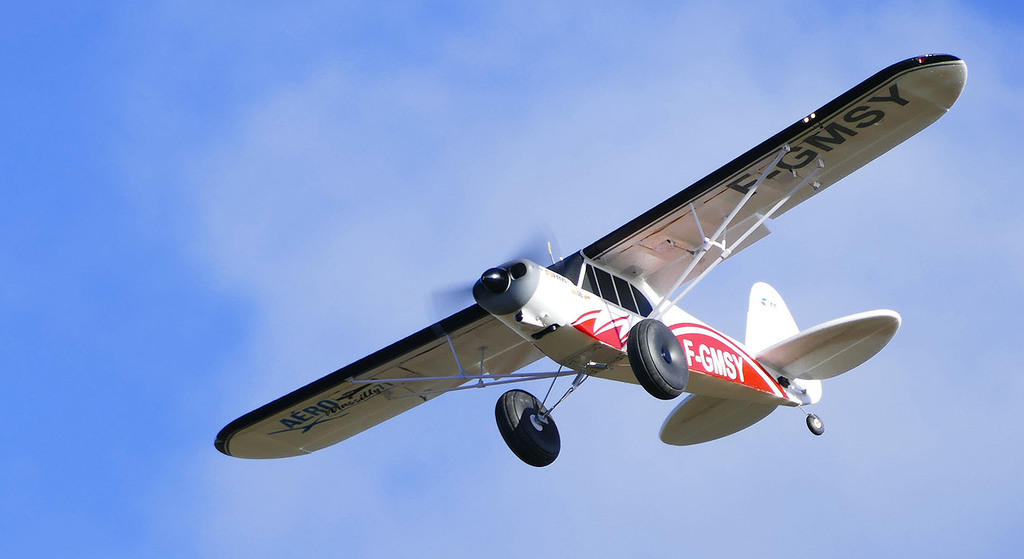
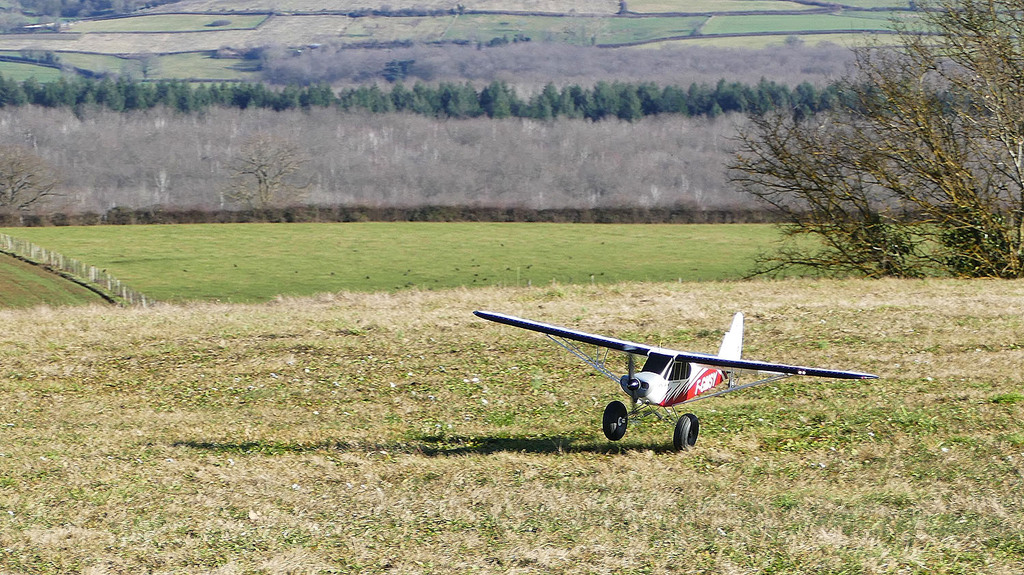
Album photo du F-GMSY

F-GMSY photo album

Version imprimable | Plan du site
© Jean-Louis Coussot